Email is governed by a protocol called Simple Mail Transfer Protocol. This specific protocol controls how messages are sent and received across the Internet from one server to another. In a nutshell, SMTP matters to anyone who uses email because it ensures that email communications are sent and received appropriately and effectively.
SMTP settings also apply to the connection to Microsoft Outlook, the email application. Without these settings, connections will fail. SMTP secures these connections. Thus, Microsoft Outlook protects your privacy and that of your recipient, but also makes sure that you, when sending an email, have the correct configuration to ensure your email is actually received, and not accidentally redirected to someone’s spam folder.
This article simplifies email security by providing step-by-step instructions on how to set up your SMTP settings in Outlook. By giving you a simple and easy-to-follow route to configure your SMTP settings in Outlook, this tutorial seeks to make the procedure easier and safer for your email.
Understanding SMTP and its role in email transmission
SMTP operates by relaying an email from server to server until the communication reaches its intended location. You can think of an SMTP server as a post office. It’s not merely about the act of communication. It’s about the efficiency and accuracy of communication.
Take for example the process of sending an email via SMTP:
- The server sending your message attempts to connect with the receiver’s appropriate server through a process known as “handshaking.”
- This initial communication attempts to get everything in place for assured, guaranteed delivery.
- However, if the handshake doesn’t occur—meaning a failure in communication as to which server belongs to which party or an error in password entry—then the email is not sent.
Therefore, this is why you must enter certain SMTP settings manually in your email client—your Microsoft Outlook.
If there is any type of misconfiguration at all, your email will go out to other servers but it never be appropriately received by anyone els—much less your target inbox.
Among these configurations are the proper port, address of the SMTP server, and authentication needed to confirm one’s identity each time an email is sent. With these configurations ensured, one’s transmissions and sensitive information sent via email remain secure and private.
Preparing to configure your SMTP settings in Outlook
Gather the necessary information
- SMTP server address. This is the address of the server that Outlook will connect to for sending emails. Typically, your email provider will supply this information.
- Username and password. These are your email account credentials that authenticate your access to the SMTP server.
- Port numbers. SMTP servers can use different ports for sending emails. Common ports include 25, 465, and 587, depending on whether your email setup requires SSL or TLS encryption.
Outlook SMTP settings
Server Address: smtp-mail.outlook.com
Username: Your Outlook email address (e.g. example@outlook.com)
Password: Your Outlook password
Port Number: 587 (With TLS)
Alternative Port Number: 25 (Without TLS/SSL)
Sending Limits: 300 emails a day or 100 recipients a day.
Access account settings in Outlook
- Access Outlook. Start the Microsoft Outlook software on your PC.
- Go to the ‘File’ option in the Outlook window’s upper left corner. It will launch the Account Information page.
- Select “Account Settings” once in the resulting dropdown menu, then again. This will bring up a fresh window with a list of all of your set up email accounts.
- Choose the email account you wish to configure from the list and hit ‘Change.’ This launches the chosen email account’s settings panel.
Step-by-step guide to configuring SMTP settings in Outlook
Step 1: Open Outlook and access the account settings menu
- First, you will need to load Microsoft Outlook onto your computer.
- Once Outlook is loaded, go to the top left of the screen while in the program and click on the tab that says ‘File’. This opens backstage view.
- You want to ensure that ‘Info’ is selected and go to the next option below.
- Find and click on ‘Account Settings’ from this selection. Then, from the drop-down menu of Account Settings, select ‘Account Settings’ one more time, and the email account settings box will appear.
Step 2: Select the email account to configure
- Should you already have other email accounts set up in Outlook, they will be visible in the Account Settings as well.
- Select the email account for which you wish to set up SMTP and click on ‘Change.’ You will then be brought to the settings window for that particular email account.
Step 3: Enter the SMTP server details
Within the settings window for your email account, scroll to the ‘Outgoing mail server (SMTP)’ field. Here, you will need to input several pieces of information:
- SMTP server address. Enter the server address provided by your email service provider. This address typically looks something like ‘smtp.yourprovider.com’.
- Port settings for SMTP. Enter the port number recommended by your email provider. Common ports include 587 for TLS encryption or 465 for SSL encryption.
- Authentication requirements. Ensure that the option ‘My outgoing server (SMTP) requires authentication’ is checked. This is usually necessary and means you’ll need to enter your username and password again, even if they are the same as your incoming mail server.
- Encryption settings. Choose the appropriate encryption type from the dropdown menu according to your provider’s recommendations. Options typically include None, SSL/TLS, or STARTTLS. Read more here: SSL and TLS Certificate Errors in Email Servers: How They Impact Deliverability
Step 4: Test the configuration
- After this is completed, select Next to finalize your selections.
- Hit Test Account Settings. You’re basically going to create a dummy email to check whether your outgoing server settings are accurate and if you can send an email.
- Outlook will try to send a test message based on the information you’ve provided, and if successful, a box will pop up that says the test email was sent successfully. If unsuccessful, check everything you’ve entered again for spelling errors.
- Go back to your email provider and see if you can find the correct server address, correct port numbers, and correct authentication selections and try again. Make sure your SMTP settings in Outlook facilitate quick and secure sending and receiving of emails.
Configuring additional email protocols
Outlook POP3 settings
POP3, or Post Office Protocol 3, is used for downloading emails from a server to a single computer, then deleting them from the server.
Find and enter POP3 server details:
- POP3 server address. This address, like ‘pop.yourprovider.com’, is usually provided by your email host.
- Username and password. Enter your email credentials.
- Port settings. Typically, POP3 uses port 110 for non-encrypted connections and port 995 for SSL encryption.
- Enable encryption. If your provider supports it, enable SSL under the ‘More Settings’ or ‘Advanced’ options.
Outlook IMAP settings
IMAP, or Internet Message Access Protocol, allows you to access your emails from multiple devices, keeping them synced in real-time.
Understanding differences between POP3 and IMAP:
- POP3 downloads and typically deletes the mail from the server, best for single device access.
- IMAP syncs emails with the server, allowing multiple devices to access and manage the same inbox.
Configuring IMAP settings and synchronization options:
- IMAP server address. Similar to SMTP and POP3, this will be something like ‘imap.yourprovider.com’.
- Port settings. IMAP usually uses port 143 for non-encrypted connections or port 993 for SSL encryption.
- Enable encryption. Select SSL from the encryption options if it’s supported.
- Synchronization settings. Configure how often Outlook checks the server for new messages and what emails to keep synced.
Troubleshooting common SMTP, POP3, and IMAP configuration issues
Common issues users might face
- Authentication errors. These occur when Outlook cannot authenticate the login details with the mail server. It might result from incorrect username, password, or security settings.
- Server not found. This issue appears when Outlook cannot connect to the mail server. It could be due to incorrect server address entries, network issues, or server downtime.
- Failed connection to the SMTP server. This might happen if the server settings, port configurations, or firewall settings are incorrect or too restrictive.
Troubleshooting techniques
For authentication errors
- Verify credentials. Double-check the username and password entered in the account settings. Ensure there are no typos or outdated passwords.
- Check security settings. Ensure that the security settings match those required by your email provider, such as SSL/TLS settings and authentication methods.
For server not found
- Confirm server address. Ensure the server address is typed correctly without any mistakes. Check with your email provider for the correct server addresses for SMTP, POP3, and IMAP.
- Test network connectivity. Make sure your internet connection is stable and active. Try accessing other online services to confirm.
- Contact your ISP or email provider. Sometimes, the problem may be on the server side, or there could be routing issues affecting your connection.
For failed connection to the SMTP server
- Review port settings. Confirm that you are using the correct port for your SMTP, POP3, or IMAP settings. Common SMTP ports are 25, 587 (for TLS), and 465 (for SSL); ensure your email provider hasn’t specified different ones.
- Check firewall and antivirus settings. Sometimes, these software solutions block ports or domains they consider unsafe. Adjust your settings to allow Outlook to communicate through the firewall or disable the antivirus temporarily to see if it resolves the issue.
- Enable logging in Outlook. This can provide detailed insights into what happens during the connection process. You can enable logging by going to File > Options > Advanced and selecting the ‘Enable troubleshooting logging’ option under Other. After reproducing the error, check the logs to identify where the failure occurs.
Best practices for maintaining SMTP, POP3, and IMAP settings
It’s not by chance that you are able to send and receive email regularly and securely because you use SMTP, POP3, and IMAP settings within Outlook.
- Two of the key things to remember are frequently changing your password, and in the event that your server identity changes with your email provider, changing these settings.
- The more that passwords are changed—in addition to them being difficult and not used anywhere else—the more secure you are—we found out every three to six months is the sweet spot.
- When you understand the health and uptime of your email server, avoiding outages is easy. Routine health checks and assessing email deliverability can help you stay ahead of calamities before they interfere with communication.
Enhancing email deliverability with Warmy.io
Warmy.io helps increase the likelihood that your emails will end up in recipients’ inboxes instead of their spam folders. So this tool essentially levels up the success rate of your email campaigns through its various tools and features.
AI-powered email warmup, enhanced with customizable options

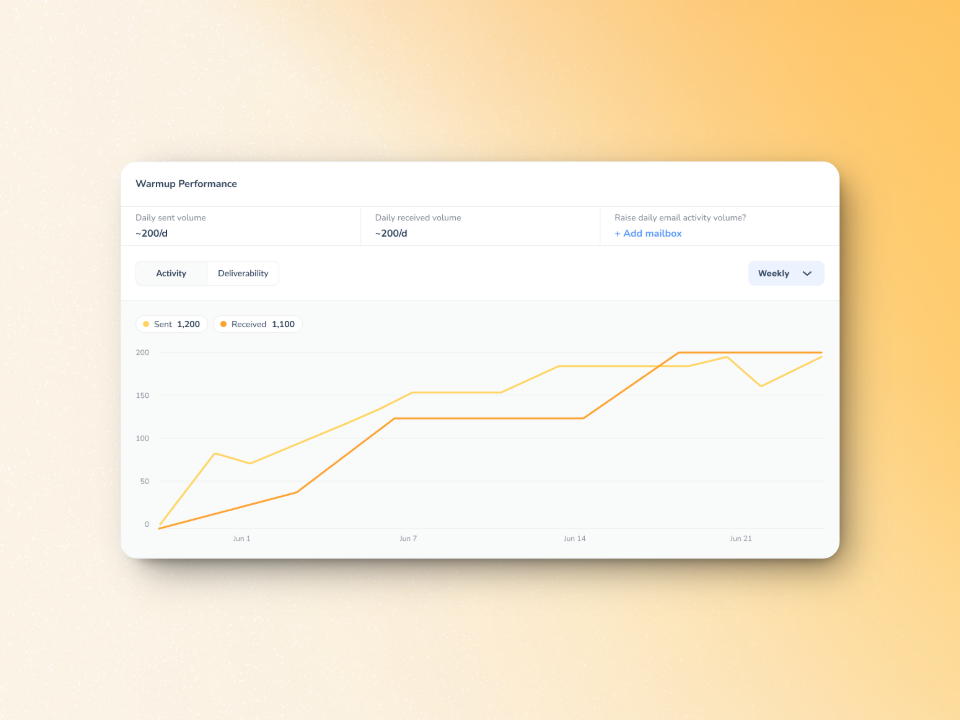
Warmy gradually increases the volumes of email sent from your account to slowly yet progressively build trust with various mailbox providers. The engagement mimics actual human behavior, such as email opens, replies, marks as important, and even clicks on links.
With the ability to work with more than 30 languages, the warmup process is tailored to your international recipients.

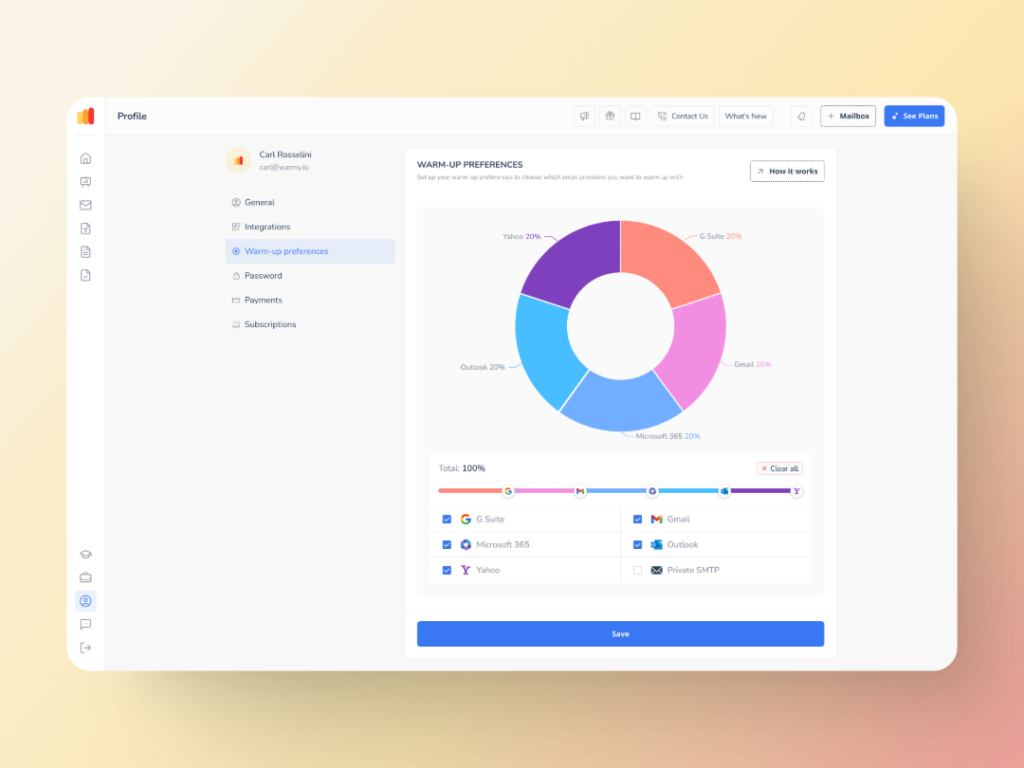
Now enhanced with the new Warmup Preferences feature, the already smart warmup process is even better. The new feature allows senders to:
tailor the warmup distribution for a range of different providers
choose between B2B or B2C customer engagement patterns, which helps them customize the behavior and insights as per their business requirement.
fine-tune these settings right inside the Warmy platform
Strong inbox placement with advanced seed lists

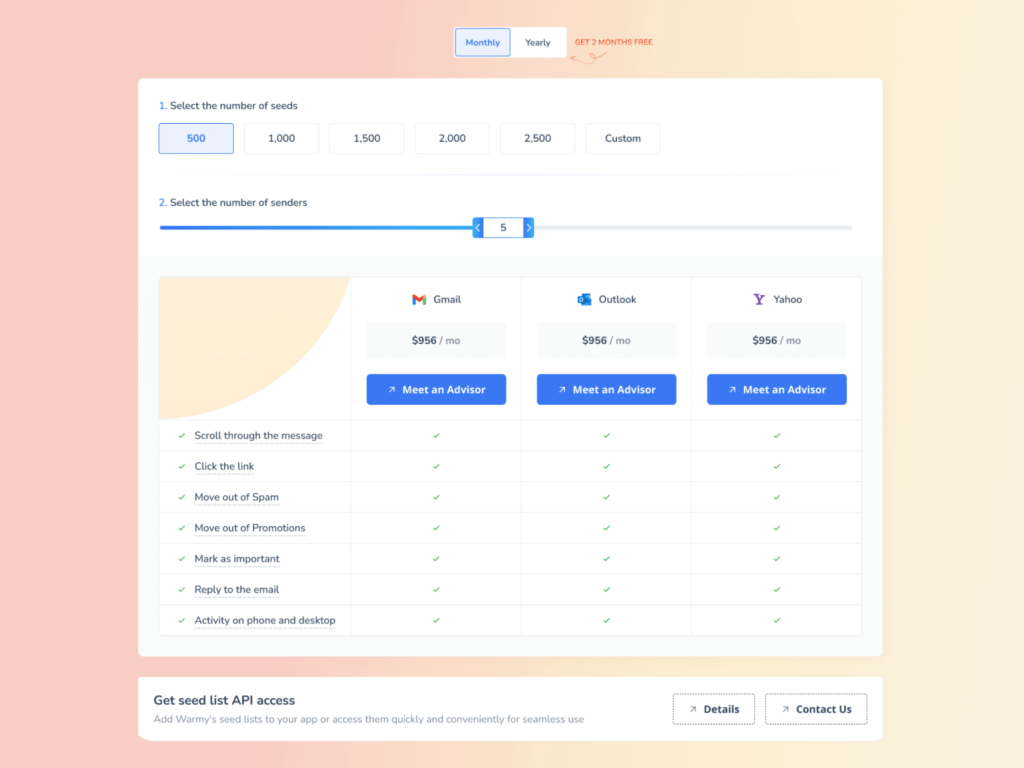
Warmy’s Email Seed List features real, live email addresses from top providers such as Google, Outlook, and Yahoo.
Unlike static seed lists where recipients are simply sent messages, Warmy’s system is dynamic and simulates real recipient behavior. This even includes recovering emails that land in spam and then marking them as important to let ESPs know you are to be trusted.
To further enhance your deliverability, the new API Endpoint for Established Seed List allows senders to effortlessly retrieve, manage, and configure seed list splits while directly integrated into your system. This effectively reduces errors and saves valuable time.
Warmy’s research team recently conducted a study on how seed lists affect inbox placement and sender reputation in Microsoft 365. You can access it here: Outlook Seed Lists & MS365 Deliverability: The Battle Between New and Established Lists
Email deliverability test helps pinpoint issues before they cause SMTP errors
Warmy’s free email deliverability test provides a detailed deliverability score for evaluating email reputation.
It checks if your emails are landing on the target inboxes and shows the percentage of emails that ends in spam, promotions, inbox, and unreceived across major email providers.
Additionally, the test reveals if your domain or IP is listed anywhere on any blacklists so you can start the delisting process if ever.
It's time to transform your email deliverability
Proper configuration and setup of SMTP settings is crucial when it comes to the success of your emails being delivered. However, with email deliverability being a multi-layered concept, there are other critical aspects senders must also look into.
Warmy.io provides tools and knowledge to empower email senders to take charge of their email deliverability. The question is—are you ready to step up? Try it out for free today, and you’ll see the difference.
📜 Related article:


